


9 Ways to Prevent Carbon Fiber Peeling on Your Ride
Last Updated: October 31, 2026
Quick Summary
Carbon fiber peeling is the separation of the protective clear coat from the resin layer beneath it, causing flaking, cloudiness, and exposed weave. Prevent it by washing with pH-neutral soap, keeping a sacrificial layer of wax, ceramic coating, or paint protection film on the surface, and pressing mirror caps down evenly from the center outward at install.
- Wash carbon fiber with pH-neutral car soap, a soft microfiber mitt, and plenty of water, then dry with a clean microfiber towel.
- Skip the pressure washer on edges and chips, because water finds every lifted corner and turns a pinhole into a peel.
- Protect against UV with paste wax reapplied every few weeks, ceramic coating every year or two, or paint protection film.
- Repair peeling clear coat by removing loose material, feathering the edge with 600- to 800-grit paper, and applying a fresh 2K clear in thin passes.
- Call a pro when the weave is fuzzy, the part feels soft, or damage runs under the edges of the laminate.
Table of Contents
- Why Carbon Fiber Peeling Happens (And Why It's Not Always the Part's Fault)
- How to Clean Carbon Fiber Car Parts Without Wrecking the Finish
- How to Protect Carbon Fiber from UV Damage Before the Sun Wins
- Carbon Fiber Mirror Cap Installation Done Right the First Time
- Carbon Fiber Clear Coat Repair: Fixing Peeling Before It Spreads
- The Maintenance Schedule That Keeps Weave Looking Wet
- When to Call It: DIY Limits and Safety Gear You Shouldn't Skip
- Shop Carbon Fiber Parts That Are Built to Last
- Frequently Asked Questions
Why Carbon Fiber Peeling Happens (And Why It's Not Always the Part's Fault)
Here's the hard truth about how to prevent carbon fiber peeling: most of the time, the part didn't fail. The finish did. Plenty of good weave gets blamed for a bad clear coat, and that's a shame, because the fix is usually simpler than replacing the part.
Carbon fiber peeling is the separation of the protective clear coat from the resin layer beneath it, causing flaking, cloudiness, and exposed weave. The carbon itself is usually fine. The topcoat gave up.
Think of it like sunburn on a bald guy at a car show. The protection failed.
Clear Coat vs. Resin vs. Structural Laminate: Know What You're Looking At
Before you sand anything, figure out what actually failed. There are three layers, and they fail differently:
- Clear coat: the glossy top layer. Peels in sheets or flakes at edges. Weave underneath looks intact.
- Resin: the binder holding the fibers. Turns milky, chalky, or gummy. Weave may look dry or blotchy.
- Structural laminate: the fibers themselves. White streaks, cracks, or soft spots. This is the bad one.
If you can catch a peeled edge with a fingernail and the weave below looks clean and dark, you're dealing with clear coat. That's a refinish job. If the weave looks fuzzy or dry, the resin is compromised and a simple re-clear won't save it.
The Four Horsemen: UV, Heat, Moisture, and Chemicals
Four things kill clear coat, and they usually tag-team.
UV exposure is the headliner. Sunlight breaks down the clear coat's chemistry over time, and a horizontal part like a spoiler or hood takes the worst of it. Heat cycles the part through expansion and contraction until the bond at the edges starts to let go. Moisture creeps under any lifted edge and lifts it further. Chemicals, harsh degreasers, bug spray, automatic car wash soaps, soften the coat and speed the whole process up.
Watch out: cheap "one-step" polish and wax combos often contain solvents that do more harm than good on a cured clear coat.
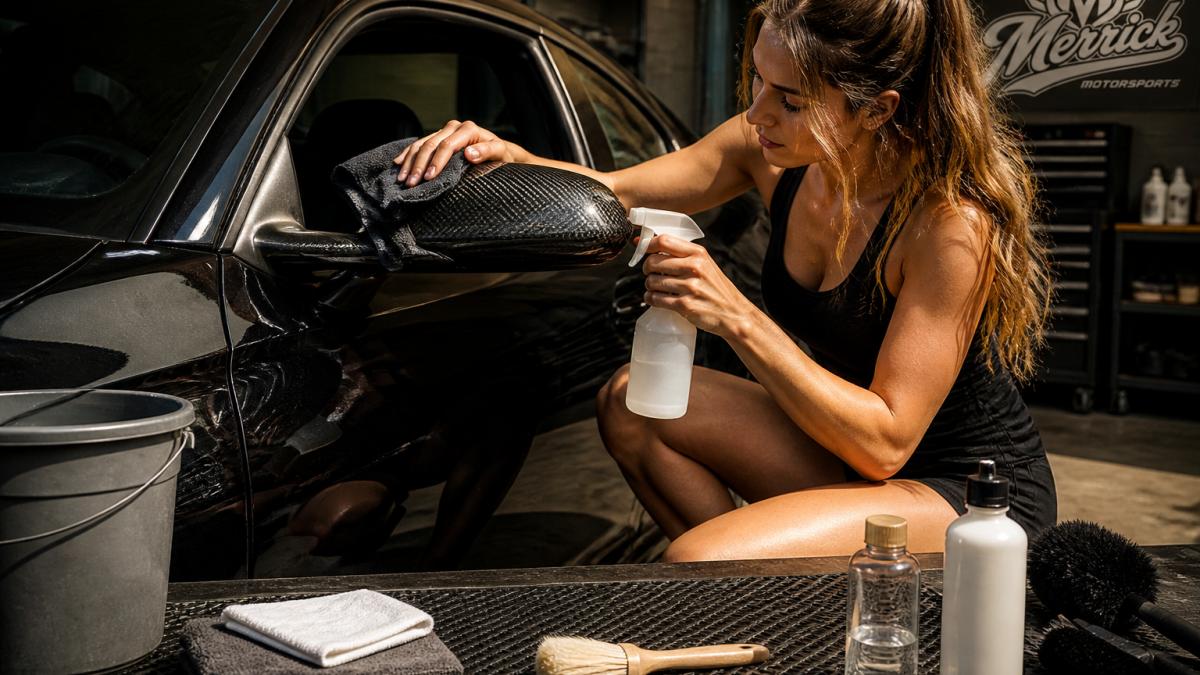
How to Clean Carbon Fiber Car Parts Without Wrecking the Finish
Cleaning is where a lot of damage starts. Do it right and you add years to the finish. Do it wrong and you're the guy who pressure-washed his mirror caps into a science experiment.
Wash carbon fiber parts with a pH-neutral car soap, a soft microfiber mitt, and plenty of water, then dry with a clean microfiber towel. That's the short version. The long version is where the money is.
The Two-Bucket Method (Yes, It Matters)
Here's the routine we'd use on our own cars:
- Rinse first to float off grit. Rubbing dry dust is sandpaper with extra steps.
- Two buckets: one with soapy water, one with clean rinse water. Dunk your mitt in the rinse bucket before reloading with soap. Your back will thank you and so will the weave.
- Top-down, one panel at a time. Don't scrub in circles like you're waxing a '57 Chevy. Straight lines, light pressure.
- Skip the pressure washer on edges and chips. Water finds every lifted corner and turns a pinhole into a peel.
- Never use a dry towel on a dusty part. Scratch city, population: your clear coat.
What's Actually in Your Soap (And Why It Matters)
Not all car soap is created equal. A pH-neutral soap (most quality car shampoos land in the 7-8 range) won't strip wax or attack the clear coat's chemistry. Dish soap? That's for greasy pans, not carbon fiber. It's alkaline enough to degrade the topcoat over time and leave the weave looking chalky.
Avoid solvent-heavy bug and tar removers directly on carbon. Use them on paint only, and even then, keep them off edges. A common pattern among detailers is to pre-soak bug splatter with a microfiber towel and warm water rather than reaching for the chemical cannon.
Drying Without Introducing New Problems
A clean microfiber drying towel is your friend. A chamois that's been sitting in the trunk since last season is not. Use a blotting motion on edges and a gentle drag on flat surfaces. If you see water spots after drying, you waited too long, or your water is hard enough to etch glass.
For a deeper clean between washes, a detailing spray and a plush microfiber will do the job without touching the coat. If you want a full product lineup that plays nice with glossy finishes, our guide to detailing products for muscle cars covers what to reach for and what to leave on the shelf.
How to Protect Carbon Fiber from UV Damage Before the Sun Wins
The sun is undefeated, but you can make it work harder for the win. Protection is far cheaper than refinishing.
Protect carbon fiber from UV damage by keeping a sacrificial layer on the surface: a quality paste wax, a ceramic coating, or paint protection film. Each one takes the UV hit so your clear coat doesn't.
Which one fits your life?
| Protection | Effort | Reapply | Best For |
|---|---|---|---|
| Paste wax | Low | Every few weeks | Weekend cars, easy touch-ups |
| Ceramic coating | Medium | Every year or two | Daily drivers sitting outside |
| Paint protection film | Higher upfront | Rarely | Hoods, spoilers, high-impact panels |
A common mistake is waxing the whole car and forgetting the mirror caps, wing, and splitter. Those small parts catch serious sun and are the first to fade. Hit them every time.
Parking smart counts too. A garage or a shade spot beats any product on this list. If you want the long version on stopping UV damage cold, our breakdown of how to prevent carbon fiber yellowing goes deeper.
Carbon Fiber Mirror Cap Installation Done Right the First Time
Most peeling starts at an edge, and most edge failures start at install. Get this step right and you skip a whole category of problems.
Install carbon fiber mirror caps by cleaning the housing, test-fitting the cap, and pressing it down evenly from the center outward so no edge sits proud or lifted. A cap that doesn't sit flush will catch wind, water, and vibration, and that's how peeling begins.
Our install checklist:
- Clean the mirror housing with isopropyl alcohol and let it dry fully
- Test-fit the cap before any tape touches the car
- Warm the adhesive tape with a hair dryer on low, not a heat gun
- Press from the center out, working air bubbles to the edges
- Hold firm pressure on all edges for a full minute
- Wait a day before washing or highway speeds
Watch out: installing in cold weather without warming the tape is the classic rookie move. The adhesive never bonds right, the edge lifts, and six months later you're blaming the part.
If you're shopping for a set, our A90 Mk5 Supra carbon fiber mirror caps show what a properly finished cap looks like up close.
Carbon Fiber Clear Coat Repair: Fixing Peeling Before It Spreads
Small peel today, big ugly mess next summer. Clear coat repair is a weekend job if you catch it early. But here's the thing most guides skip: the difference between a repair that lasts five years and one that fails by Labor Day is compatibility and cure conditions, not how hard you sand.
Repair peeling carbon fiber clear coat by removing the loose material, sanding the transition smooth, and applying a fresh 2K clear coat in thin passes. The keyword is loose. Anything flaking off has to go.
Sanding Without Cutting Into the Weave
This is the step that separates a fix from a disaster. Carbon weave is thin, and one heavy-handed pass with the wrong grit can burn right through it. Then you're not fixing peeling, you're buying a new part.
- Tape off surrounding panels with masking tape before you touch an abrasive.
- Use a sharp knife or plastic scraper to lift flaking edges, not a screwdriver. This isn't a demolition derby.
- Feather the edge with 600- to 800-grit paper, keeping the block flat. Wet-sand if you can; it keeps dust down and the paper from loading up.
- Check your progress often. Stop the second the surface feels level. The weave is not a suggestion.
- Clean with isopropyl alcohol after sanding and let it flash off completely before any coating.
The real difference between a pro and a first-timer here is patience. Slow hands, light pressure, no heroics.
The Compatibility Checklist Nobody Gives You
Before you crack open a can of clear, answer these questions. If you can't, stop and do your homework.
| Check | Why It Matters |
|---|---|
| What resin is under the clear? | Epoxy and polyester resins accept different clear coats. A mismatched product can fish-eye or lift. |
| Is the clear coat 1K or 2K? | 1K (rattle-can) is softer and less UV-stable. 2K is a two-part product with a hardener and real durability. |
| What's the recoat window? | Most 2K clears have a window (often 24-72 hours) for recoating without sanding. Miss it and you're sanding again. |
| What temperature and humidity does the TDS specify? | Spraying outside the recommended range causes blushing, poor adhesion, or a finish that never fully cures. |
| Is your gun and compressor set up for the product? | A gun that can't atomize a 2K clear properly will give you orange peel you can't polish out. |
Applying 2K Clear and Leveling the Finish
2K clear is a two-part product, and it means business. Read the TDS, because cure times and mix ratios vary by brand and you don't want to guess.
- Mix per the TDS, not per your buddy's opinion.
- Apply thin coats, letting each one flash off. Two or three thin passes beat one heavy coat that runs.
- Keep the spray gun moving to avoid runs. Think of it like painting a fence: steady, even, no stopping to admire your work.
- Let it cure fully before any sanding or polishing. That means days, not hours, depending on the product and conditions.
- Level with 1500- to 2000-grit, then polish to a high gloss.
Orange peel texture is normal off the gun. Leveling and polishing brings back the wet look. Rattle-can clear is fine for a beater, but a proper 2K clear with a spray gun gives you real durability. And if you're spraying in a dusty garage with the door open, expect to polish out more texture than you'd like.
When to Put Down the Sandpaper and Call a Pro
Some jobs are driveway-friendly. Some are not. If the weave is fuzzy, the part feels soft, or the damage runs under the edges of the laminate, that's resin or structural damage. A surface recoat won't fix it, and sanding further will just make it worse. That's the point where a body shop or a composites specialist should take a look. No shame in that game. The shame is in pretending you didn't see the fuzzy weave.
The Maintenance Schedule That Keeps Weave Looking Wet
Consistency beats intensity. A little care every month goes further than a marathon detail once a year.
| Task | How Often | Time |
|---|---|---|
| Gentle wash and dry | Every 2 weeks | 15 min |
| Inspect edges for lifting | Monthly | 5 min |
| Refresh wax or coating | Every 4-8 weeks | 20 min |
| Deep clean and re-coat | Seasonally | 1 hour |
Store the car out of direct sun when you can. Touch up wax on high-exposure parts more often. And check edges after every wash, because a lifted corner is a whole lot easier to fix now than after it spreads.
When to Call It: DIY Limits and Safety Gear You Shouldn't Skip
Some jobs are driveway-friendly. Some are not, and knowing the difference saves you a repaint.
Call in a pro when the weave is fuzzy, the part feels soft, or the damage runs under the edges of the laminate. That's resin or structural damage, and a surface recoat won't fix it.
Safety first, because this stuff is not friendly:
- Respirator rated for organic vapors when spraying 2K clear. This is non-negotiable.
- Safety glasses for sanding and spraying.
- Nitrile gloves for resin and solvents.
- Ventilation, spray outside or in a well-ventilated space, never a closed garage.
- Eye and skin coverage for two-component products, which can sensitize skin over time.
If you're not comfortable spraying a two-part clear, a body shop can handle the recoat while you handle the removal and reinstall. No shame in that game.
Shop Carbon Fiber Parts That Are Built to Last
The best repair is the one you never need. Buy parts with a proper clear coat from the start and half this article becomes trivia.
Merrick Motorsports stocks over 30,000 aftermarket parts with shipping from six locations across the US, including carbon fiber body parts for Challenger, Charger, Jeep, RAM, Corvette, and Mustang builds. Not sure whether a part is quality or costume jewelry? Our guide on how to identify high quality carbon fiber breaks down what to check before you buy.
Got a peeling part that needs replacing, or a build that needs the good stuff? Browse the Merrick Motorsports catalog and give your ride the finish it deserves.
Frequently Asked Questions
Can you repair peeling clear coat on carbon fiber, or is the part toast?
Most peeling clear coat on carbon fiber is repairable if the weave underneath is intact. You'll need to strip the failing clear, sand carefully without cutting into the laminate, and reapply a quality 2K automotive clear coat. If the resin or structural laminate is cracked or cloudy, that's a bigger job and often means replacing the part. Inspect closely before you commit to a repair.
Does sun exposure really cause carbon fiber clear coat to peel?
Yes. UV exposure breaks down the clear coat's chemical bonds over time, causing it to fade, chalk, and eventually flake off. Heat cycles from sun-baked parking lots make it worse by expanding and contracting the panel. A quality ceramic coating or UV-resistant wax reapplied regularly is your best defense, especially on horizontal surfaces like spoilers and wings that catch the most sun.
How should you clean carbon fiber car parts without damaging the finish?
Use a pH-neutral car shampoo, a soft microfiber mitt, and plenty of water to lift dirt before wiping. Skip abrasive pads, harsh degreasers, and anything with solvents that can soften clear coat. Dry with a clean microfiber towel and avoid circular scrubbing on the weave. For bug splatter or tar, use a dedicated bug remover and let it dwell rather than scrubbing hard.
How do you protect carbon fiber parts after installation?
Seal the surface immediately after install with a ceramic coating or paste wax, then reapply every few months depending on sun exposure. Keep edges and mounting points clean and dry, since moisture wicking under the clear coat is a common peeling trigger. Park in shade when you can, and inspect mirror caps, spoilers, and trim monthly for early signs of lifting or cloudiness.
