


Why Bolt-On Parts Often Need Modification to Fit
Quick Summary
Bolt-on parts often need modification because "bolt-on" only describes how a part installs, not whether it will fit every car. Model-year changes, trim differences, and factory tolerances can shift mounting points, clearances, and hardware. Checking your exact year, submodel, and fitment notes before buying prevents most surprises.
- Bolt-on means the part uses existing mounting points, not that zero adjustment is needed.
- Model-year changes and trim differences can move brackets or change clearances.
- Factory tolerances and years of wear leave little room for error on tight fits.
- Confirm your exact year, make, model, and trim, or use the VIN, before ordering.
- Compare the new part to the old one side by side before removing anything.
Table of Contents
- What Bolt-On Really Means (And What It Doesn't)
- Why Bolt-On Parts Require Modification: The Real Reasons
- Bolt-On Parts Fitment Issues You Are Most Likely to Hit
- Aftermarket Parts Installation: What to Check Before You Turn a Wrench
- Do Bolt-On Performance Upgrades Need Tuning or Supporting Mods?
- Sensors, Calibration and Warranty: The Angles Nobody Covers
- Common Install Mistakes That Turn a Weekend Into a Month
- Booking Your Next Upgrade the Smart Way
- Frequently Asked Questions
Why Bolt-On Parts Often Need Modification to Fit
Last Updated: November 4, 2026
What Bolt-On Really Means (And What It Doesn't)
Bolt-on parts are supposed to be the easy stuff. You unbolt the old piece, bolt the new one on, and go grab a cold one. That's the idea, anyway. Plenty of owners have found that a bolt-on part doesn't always play nice with their car, and they've ended up with a drill, a file, and a few choice words.
Here's the honest version. "Bolt-on" describes how a part is meant to be installed: without cutting, welding, or major changes to the vehicle. It doesn't guarantee the part will drop in perfectly on every car, every year, every trim.
Bolt-on means a part installs using existing mounting points, fasteners, and connections. It does not promise zero adjustment.
So a bolt-on part can still need a little help. Think of it as a plan, not a guarantee.
Why Bolt-On Parts Require Modification: The Real Reasons
Most fitment headaches come down to a few usual suspects. Knowing them makes you a smarter shopper and a happier installer.
- Model-year changes that move brackets or clips
- Trim differences that change clearances
- Factory tolerances that leave little room for error
- Parts designed around a different sub-model
Your car is not a Lego set. Automakers change things mid-run, and aftermarket makers try to cover a lot of ground with one design.
Model-Year Changes and Trim Differences
Automakers tweak designs all the time. A bracket that lines up on a 2015 Challenger might sit a few millimeters off on a later build. Trim levels can change things too, like suspension packages, exhaust routing, or bumper and fender hardware.
That's why a part listed for "Charger" can still need a second look. Always check the year, submodel, and any fitment notes before you hit "add to cart."
Factory Tolerances and Stock Clearance
Factory parts don't always match the drawing perfectly. Every car leaves the line with small variations in stamping, welding, and assembly. Stock clearances can be tight, so a part that's only slightly off can rub, pinch, or fail to seat.
Add in a few years of wear, and the gap between "should fit" and "does fit" gets wider. A little patience with a fresh set of eyes can save a lot of frustration.
Bolt-On Parts Fitment Issues You Are Most Likely to Hit
You'll probably run into one of these, so let's name them. Recognizing the problem early keeps a quick job from turning into a month-long project.
- Mounting holes off by a hair: The bolt goes in at an angle or not at all.
- Rubbing or interference: The new part touches a fender liner, sway bar, or nearby hardware.
- Missing or different hardware: The kit uses new bolts, spacers, or brackets that your old ones don't match.
- Wrong sub-model: The part was made for a different trim or body style.
Here's a common one. Many differential covers look like straight swaps, but the housing can vary. If you run a Dana 60, our AFE Street Series Dana 60 Front Differential Cover, Raw with Machined Fins is built to match that axle, so check your housing before you order. Shoppers often prefer the AFE Pro Series Dana 60 Front Differential Cover in black once fitment is confirmed.


Fitment isn't a dealbreaker. It's a checklist item.
Aftermarket Parts Installation: What to Check Before You Turn a Wrench
Five minutes of prep beats an hour of cussing. Before you pull the first bolt, do this:
- Confirm your exact year, make, model, and trim. Use the VIN if you're unsure.
- Compare the new part to the old one. Lay them side by side and check mounting points.
- Read the fitment notes and any installation guide. Look for words like "may require" or "trimming."
- Gather the right tools. A basic socket set, torque wrench, and a bright light go a long way.
- Check the return policy. If the part doesn't fit, you want to know your options first. Our aftermarket car parts return policy guide walks through what to know before ordering or installing.
Pro tip from the garage: take photos of the original setup before you remove anything. You'll thank yourself during reassembly.
Do Bolt-On Performance Upgrades Need Tuning or Supporting Mods?
This is where the campfire arguments start. One guy swears his intake needed nothing. Another guy's check engine light came on before he backed out of the driveway. Both can be right, because "bolt-on" describes the hardware, not the software.
Here's the garage-level version of what's happening. Your engine computer (the ECU) runs on a model of how much air is coming in, how much fuel to add, and what the oxygen sensors should be reading. A bolt-on that changes airflow, a cold air intake, a header, a cat-back, a throttle body, changes the inputs that model sees. The ECU has some room to adapt through fuel trims, but that room is not infinite.
A few patterns most practitioners run into:
- Cat-back exhaust and axle-back systems: Usually the least demanding. You're changing sound and flow after the sensors, so the ECU often doesn't care. This is the closest thing to true plug-and-play.
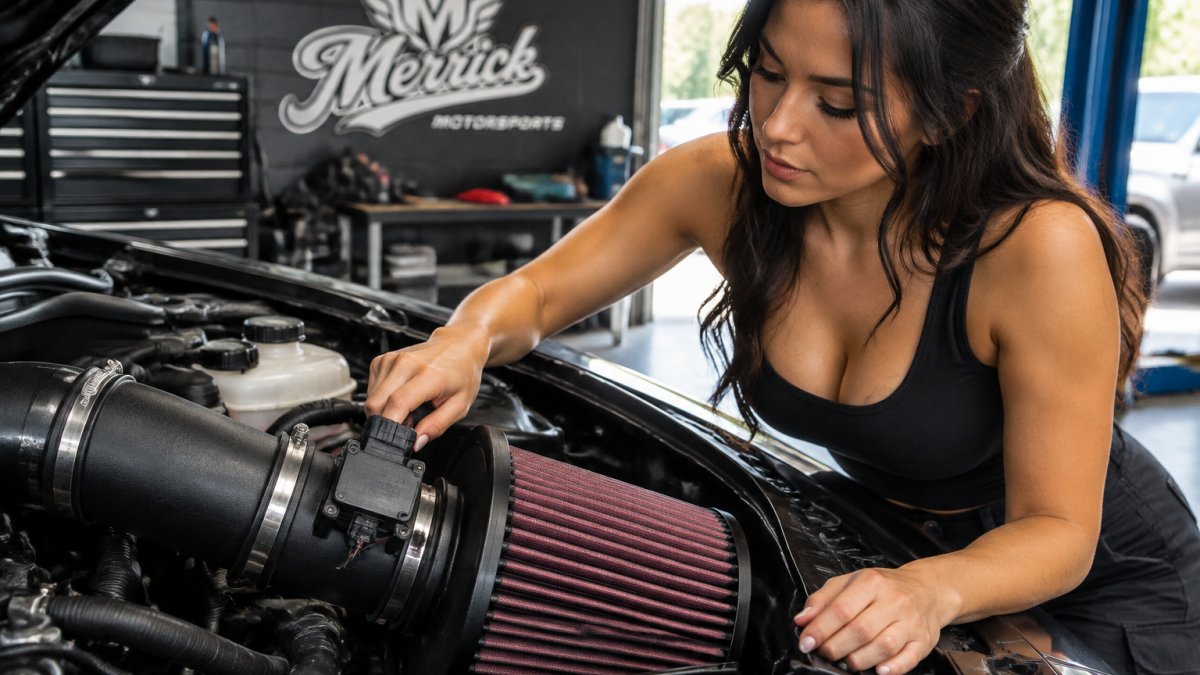
- Cold air intakes: The classic "needs a tune" argument. On many vehicles the mass air flow (MAF) sensor sits in a housing with a specific inner diameter. Swap to a larger tube and the sensor reads a smaller slice of the airflow than the ECU expects, so the engine runs lean until it's recalibrated. Some intakes are designed to keep the stock MAF housing diameter for exactly this reason.
- Headers and downpipes: These move or remove catalytic converters and relocate oxygen sensors. Expect a check engine light on many applications unless the tune accounts for it, and expect to need an O2 extension harness so the sensor reaches its new bung.
- Throttle bodies and intake manifolds: Bigger openings mean the ECU's throttle mapping and airflow tables are now lying to it. This is tune territory on most modern platforms.
The Supporting-Mod Hierarchy Nobody Explains
This is the part most guides skip. Bolt-ons aren't a flat list, they stack. One part often creates a demand that another part has to satisfy.
Think of it as a chain: more air in means more exhaust out, which means more fuel demand, which means more heat, which means the cooling and fueling systems need to keep up. Skip a link and the whole chain rattles.
QA1 99-06 Chevy Silverado 1500 2WD Bump Steer Kit →
A common hierarchy looks like this:
- Intake and exhaust first. These are the breathing mods. They set the airflow stage.
- Tuning second. Once airflow changes, the calibration needs to match, or you're leaving power on the table and risking a lean condition.
- Fueling and cooling support third. Bigger airflow on a forced-induction car can outrun the stock fuel pump, injectors, or intercooler. That's when you start shopping supporting mods.
- Drivetrain and brakes last. More power is great until the clutch or the brakes disagree.
If you're chasing serious numbers, look at the complete package rather than a single part bolted on alone. for the Toyota Supra A90 and A91 B58](page:5) is a good example of a kit built around the engine as a whole, intake, downpipe, tuning, and supporting hardware chosen to work together instead of fighting each other.
Watch out: bolting on a big intake and a downpipe without a tune can leave you with a check engine light, a lean condition under load, and less power than stock in some cases. The parts aren't bad, the calibration is just behind.
Full Bolt-On (FBO) Builds, What That Actually Means
"FBO" gets thrown around like a badge of honor. In practice it means you've done the common breathing mods, intake, downpipe or headers, exhaust, and often an intercooler or charge pipe on turbo cars, and you've tuned for them. It's a package, not a single purchase. The guys who get the most out of an FBO build are the ones who planned the order of operations before the first box showed up.
Sensors, Calibration and Warranty: The Angles Nobody Covers
Most guides wave at this topic and move on. Let's actually dig in, because this is where bolt-on dreams go to die, quietly, in a parking lot, with a yellow light on the dash.
Why a Simple Intake Trips a Check Engine Light
Your engine computer doesn't measure air directly. It infers airflow from sensors, the mass air flow (MAF) sensor, the manifold absolute pressure (MAP) sensor, and the oxygen (O2) sensors before and after the catalytic converter. It then trims fuel based on what the O2 sensors report.
When you change the intake tract, you change what those sensors see. A larger MAF housing makes the sensor report less air than is actually entering, so the ECU adds less fuel, and the O2 sensor reports a lean condition. The ECU responds with positive fuel trims, sometimes enough to adapt, sometimes not. Push past the trim limit and you get a check engine light, a rough idle, or both.
A few specific patterns worth knowing:
- MAF housing diameter: Intakes that keep the stock MAF housing size are far more likely to run clean without a tune. Intakes that enlarge it usually need recalibration.
- O2 sensor relocation: Headers and downpipes often move the sensor bungs. If the harness won't reach, you need an extension, not a spliced wire in the driveway. Our Dodge Hellcat O2 sensor extension, front, 6-pin, 12-inch is made for exactly that job, with the right connector instead of electrical tape and hope.
- Catalytic converter efficiency codes: Removing or moving a cat can trigger a P0420-family code on many vehicles. A tune can account for it; ignoring it usually can't.
Watch out: a spliced O2 harness can introduce resistance and intermittent codes that are a nightmare to chase. Use a proper extension harness with the correct connector.

Warranty: What the Law Actually Says
Here's the part that gets repeated wrong at every cars-and-coffee meet. A bolt-on part does not automatically void your new-car warranty. The federal Magnuson-Moss Warranty Act limits how manufacturers can condition coverage on using their own parts, a dealer generally can't void your whole powertrain warranty just because you installed an aftermarket intake.
But, and this is a big but, the manufacturer can deny a specific claim if it can show the aftermarket part caused the failure. An intake alone rarely does that. A tune that raises boost past the stock calibration is a much harder conversation, because the ECU logs it.
A few practical patterns:
- Keep receipts and installation notes. If a claim gets questioned, documentation is your friend.
- Understand the difference between a part and a tune. A cat-back exhaust is low-risk. A custom calibration on a turbo car is higher-risk, and many dealers can see flash counters.
- Talk to your dealer before you start if coverage matters to you. Some are mod-friendly; some are not. Knowing which one you're dealing with beats finding out at the service counter.
- Read the Magnuson-Moss basics. Plain-language guidance on how the act works is worth a few minutes before you spend money on parts.
FTC guidance on auto warranties and aftermarket parts
None of this is meant to scare you off bolt-ons. It's meant to keep you from being surprised. The guys who plan for sensors and warranty questions up front are the ones still smiling when the job is done.
The sensor and calibration issues that most often turn a bolt-on upgrade into a headache are summarised below.
| Issue | Cause | Fix |
|---|---|---|
| Check engine light after intake | Larger MAF housing reads less air | Recalibrate the tune |
| O2 sensor won't reach | Headers or downpipes move the bung | Use a proper extension harness |
| P0420-family code | Removed or moved catalytic converter | Account for it in the tune |
| Lean condition under load | ECU adds too little fuel | Tune to match airflow changes |
| Warranty claim questioned | Aftermarket part blamed for failure | Keep receipts and install notes |
Common Install Mistakes That Turn a Weekend Into a Month
We've all been there. Here are the classic blunders:
- Skipping the fitment check and finding out at step ten
- Forcing a part instead of figuring out why it won't seat
- Losing track of which bolt goes where
- Overtightening into stripped threads
- Ignoring a rubbing noise until it becomes a hole in the fender
Slow down, double-check, and keep the bolt bag organized. Your future self will be grateful, and your buddies will stop calling it "the three-day job."
Booking Your Next Upgrade the Smart Way
You don't need a magic part. You need a part that matches your car, and a plan for the parts that don't quite fit out of the box. Check your year and trim, read the notes, and budget a little time for adjustments. Shop with the tools in front of you, and call in a pro if the job goes sideways.
Ready to shop? Browse the Merrick Motorsports catalog for parts matched to Dodge, Ram, Jeep, Corvette, and Mustang builds. Find your fitment, grab the right hardware, and get back to the fun part.
Frequently Asked Questions
What are bolt-on modifications?
Bolt-on modifications are parts installed with the factory fasteners and mounting points, without cutting, welding or permanent changes to the body or chassis. The idea is a simpler install than fabrication. In practice, many bolt-on parts still need small adjustments such as trimming a liner, relocating a bracket or reusing a spacer to clear a neighboring component. Read the fitment notes before you order, and plan for a little extra time on the first install.
Do bolt-on performance parts require tuning?
Not always. Some bolt-on upgrades, such as certain intake or exhaust components, can run correctly without a tune, although the engine may reach its target torque more easily with one. Other parts that change airflow or fueling can trigger sensor readings or check engine lights that call for recalibration. Check the product notes for your specific model year, and factor tuning into the budget if the listing recommends it.
Are bolt-on parts always direct fit?
No. Direct fit means the part should install with the existing hardware and mounting points on your specific year, trim and body style. Differences between model years, trim levels and factory tolerances can still cause rubbing, misalignment or clearance problems. Compare your vehicle's year and submodel against the fitment table, and set aside time to test-fit before final tightening.
What should I check before installing a bolt-on part?
Start by confirming the year, make, model and submodel against the fitment list. Next, lay out the included hardware and compare it to the factory fasteners. Then do a dry fit with everything loose, checking clearance to nearby parts, wiring, brake lines and suspension travel. If something rubs or does not seat, stop and resolve it before torquing anything down. A few minutes of checking can save hours of rework.
