


How to Install LED Light Bars: Complete DIY Guide
Table of Contents
- What You'll Need Before Installing an LED Light Bar
- Choosing a Suitable Mounting Location and Selecting Your Light Bar
- Installing LED Light Bar Mounting Brackets
- How to Mount a Light Bar Without Drilling
- LED Light Bar Wiring Harness Installation and Electrical Setup
- LED Light Bar Troubleshooting and Testing
- Beam Aiming, Legal Considerations, and Common Mistakes to Avoid
- Frequently Asked Questions
Last Updated: October 11, 2026
What You'll Need Before Installing an LED Light Bar
Most LED light bar installations take 2-4 hours, and to install LED light bars you'll need basic tools and electrical components.

Gather these tools before you begin:
- Socket set and wrenches
- Screwdrivers (Phillips and flathead)
- Wire strippers and crimpers
- Drill with bits (if drilling mounting holes)
- Cable ties and wire loom
- Multimeter for testing electrical connections
- Flashlight or work light
You'll also need the light bar itself, mounting brackets, a wiring harness with relay and fuse, and connectors. The vehicle manufacturer's electrical specifications will tell you the proper wire gauge and fuse rating for your specific model.
Check your vehicle's battery voltage before starting. Most LED light bars run on 12V systems, but some trucks use 24V. Verify this matches your light bar's requirements. Having the correct voltage prevents damage to your equipment and keeps you safe.
Choosing a Suitable Mounting Location and Selecting Your Light Bar
Your mounting location affects performance, appearance, and cooling. The best spot balances visibility, airflow, and aesthetics.
Common mounting locations include:
- Roof rack: Highest position, best visibility, but impacts aerodynamics
- Bumper or grille: Lower profile, easier installation, good for off-road use
- A-pillar: Integrated look, popular on newer vehicles
- Light bar mounts: Purpose-built brackets that integrate with factory hardware
Consider airflow and heat dissipation. LED light bars generate heat, and mounting them in blocked areas reduces their lifespan. A roof position works well for trucks and off-road vehicles.
Mark the spot with tape and verify it won't interfere with your hood, wipers, roof rack, or water drainage.
Vehicle-specific differences matter. Check your vehicle's load capacity and mounting points before drilling.
Mounting solutions engineered for specific models are crucial. A mount designed for one model won't work properly on another, even if they look similar.
Installing LED Light Bar Mounting Brackets
Mounting brackets transfer the light bar's weight to your vehicle's frame and must be installed securely.
Start by identifying your vehicle's mounting points. Most newer vehicles have factory accessory mounting holes or pre-drilled locations. If your vehicle has these, use them.
If factory mounts don't exist, you'll need to drill. This is where precision matters.
Steps for bracket installation:
- Place the bracket against your mounting surface and mark the hole locations with a marker
- Use a center punch to create a small divot at each mark
- Drill pilot holes first (smaller diameter than your final bolts)
- Drill the final holes at the marked size
- Insert bolts with washers and lock washers to prevent loosening
- Tighten gradually in a cross pattern (like tightening car wheels)
Most brackets use bolts in the 15-25 foot-pound range. Over-tightening strips threads; under-tightening causes vibration.
For vehicles like the Jeep Wrangler JL and Gladiator JT, the Oracle integrated system uses factory accessory points and requires no drilling.

Test the bracket's stability before moving to wiring. Push up and down on the light bar. It should not flex or move. Any movement means your bolts need tightening.
How to Mount a Light Bar Without Drilling
Not every installation requires drilling holes. Several mounting methods avoid permanent modifications to your vehicle.
Adhesive mounting systems use industrial-strength tape or epoxy on smooth surfaces. Clean with rubbing alcohol and wait the full cure time (usually 24 hours). Adhesive works best on newer vehicles with smooth plastic surfaces; older vehicles with textured paint often reject adhesive mounts, especially in hot climates.
Clamp-based systems grip existing structures without drilling and are fully reversible. Magnetic mounts stick to metal surfaces but have lower weight capacity, suiting lighter LED bars only.
Factory accessory points are the best option if your vehicle has them. These pre-drilled holes exist specifically for add-ons. Using them requires no additional drilling and distributes weight properly.
LED Light Bar Wiring Harness Installation and Electrical Setup
Understanding Your Wiring Harness Components
A proper wiring harness protects your vehicle's electrical system from overload and shorts. The typical harness includes a relay, fuse, switch, and power and ground wires.
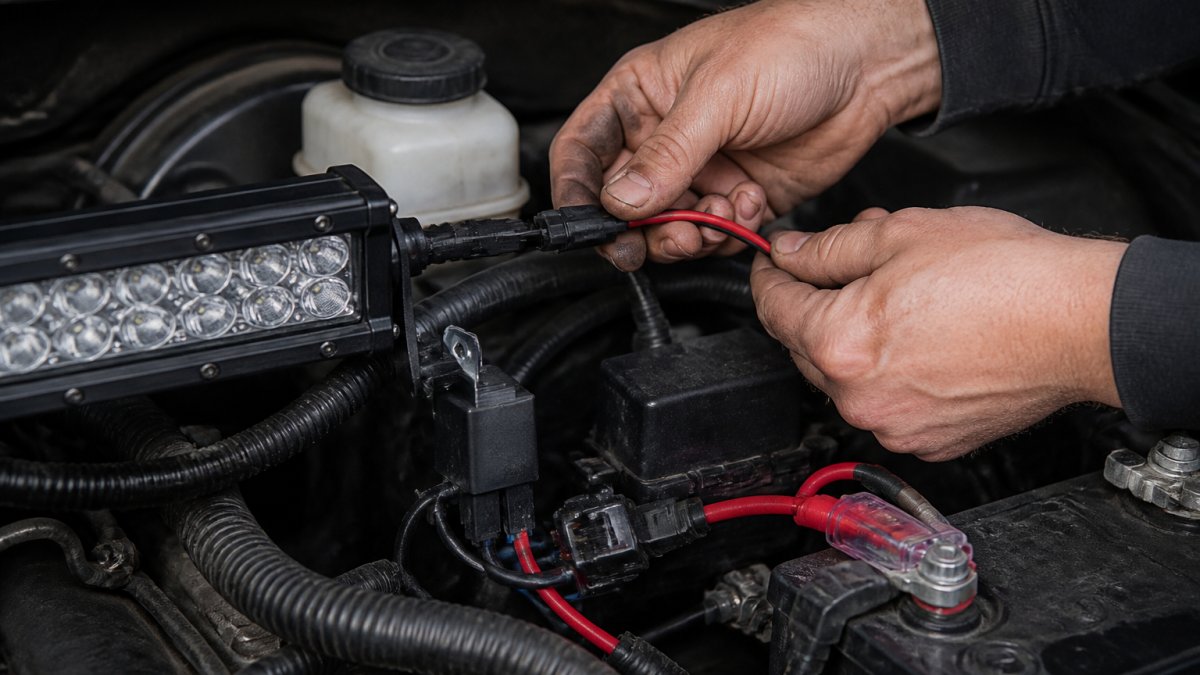
The relay carries power from your battery to the light bar without overloading your vehicle's main electrical panel.
The fuse protects against shorts. Use a fuse rated 5 amps higher than the light bar's maximum draw (most LED bars draw 20-50 amps).
The switch lets you turn the light bar on and off.
Power and ground wires connect everything. The power wire runs from the battery's positive terminal to the relay.
For a 20-50 amp circuit, use 4 or 6 gauge wire. For circuits over 50 amps, use 2 gauge.
Routing Wires Through the Engine Bay
Running wires cleanly prevents damage and looks professional. Wires exposed to moving engine parts, sharp edges, or heat sources fail quickly.
Route power wires along existing harnesses using cable ties spaced every 6-12 inches to prevent sagging.
Avoid these danger zones:
Oracle 2021+ Ford Bronco Integrated Windshield Roof LED Light Bar System →
- Near the radiator fan (moving parts cause abrasion)
- Directly against the exhaust manifold (heat melts insulation)
- Across sharp metal edges (vibration cuts through wire)
- Under engine block (heat and oil damage insulation)
Use wire loom or split tubing to protect wires in high-risk areas. Run the power wire from the battery along the driver's side toward the front, away from moving engine parts and heat sources.
The ground wire should run from the light bar's negative terminal to a solid metal point on the vehicle's frame. Clean the mounting point with a wire brush to remove paint and oxidation, as poor ground connections cause flickering and dimming.
Connecting the Relay and Fuse
The relay mounts near the battery or inside the engine bay. Some installers mount it under the hood on a bracket. Others secure it to the inner fender.
Connect the relay in this order:
- Positive battery terminal to relay input (using the fuse and switch)
- Relay output to the light bar's positive terminal
- Light bar's negative terminal to vehicle ground
- Switch wire from relay to dashboard switch
The fuse installs in the positive wire between the battery and relay. Use an inline fuse holder. This small plastic case holds the fuse and protects the wire in case of shorts.
Test each connection with a multimeter before powering on. You should read 12-13.5 volts at the light bar's positive terminal when the ignition is on. If you read 0 volts, check for loose crimps or corroded terminals.
LED Light Bar Troubleshooting and Testing
Test your installation before declaring it complete. A few minutes of testing now prevents frustration later.
Light bar won't turn on: Check battery voltage first.
Light bar is dim: Clean the ground terminal with a wire brush to remove paint and corrosion.
Light bar flickers: Wiggle each connection while the light bar is on. If it flickers when you move a wire, that connection is loose. Disconnect, clean, re-crimp, and reconnect.
Lights flicker when engine starts: This is normal momentarily. If it continues, have your battery tested at an auto parts store.
Test the light bar's beam pattern. Turn it on in a dark garage or parking lot. The beam should be even and bright.
Beam Aiming, Legal Considerations, and Common Mistakes to Avoid
Aiming Your Light Bar Correctly
Proper beam aiming keeps light on the road and out of oncoming drivers' eyes. A poorly aimed light bar is dangerous and illegal on public roads.
Aim your light bar so the beam points slightly downward to illuminate the road without blinding oncoming drivers. If your light bar has adjustable brackets, tilt it down 10-15 degrees from horizontal and test the beam pattern on a wall.
For off-road use, you can aim higher. There's no oncoming traffic, so maximum visibility is the goal.
Legal Requirements for Road Use
LED light bars are legal for off-road use in all states. On public roads, the rules vary by state and local jurisdiction.
Most states prohibit forward-facing light bars on public roads during daylight. Some allow them if they're dimmed or only used during low-light conditions.
Check your state's vehicle code before installing a forward-facing light bar. The National Highway Traffic Safety Administration lighting standards provide baseline federal rules. Your state may have stricter rules.
Roof-mounted light bars used for off-road driving are generally legal everywhere. Bumper-mounted bars are more restricted.
Document your light bar's specifications. Know the lumens output, beam pattern, and color temperature. If a police officer questions your installation, you can show that it meets safety standards.
Common Installation Mistakes to Avoid
Mistake 1: Undersized wire gauge. Use the recommended gauge for your light bar's amperage; when in doubt, go one size larger.
Mistake 2: No fuse protection. Always install a fuse to protect your electrical system.
Mistake 3: Poor ground connections. Clean the mounting point and use a star washer under the bolt.
Mistake 4: Running power through the vehicle's main panel. Always use a relay to handle the high current draw.
Mistake 5: Mounting without checking load capacity. Verify your vehicle can handle the weight before mounting.
Mistake 6: Ignoring vehicle-specific differences. Always check your specific vehicle's manual before drilling or mounting.
| Common Mistake | What Goes Wrong | How to Fix It |
|---|---|---|
| Undersized wire | Wire overheats and melts insulation | Use 4-6 gauge for 20-50 amp circuits |
| No fuse | Electrical shorts damage vehicle wiring | Install inline fuse rated 5 amps above light bar draw |
| Poor ground connection | Light bar flickers or dims | Clean mounting point and use star washer |
| Power through main panel | Overloads truck's electrical system | Use relay to handle current draw |
| Wrong mounting location | Light bar vibrates loose or fails | Verify load capacity before mounting |
| Ignoring vehicle specs | Parts don't fit or fail prematurely | Check vehicle manual for your specific model |
When you install LED light bars, it transforms your vehicle's appearance and functionality. Our Oracle integrated systems use factory mounting points and include all necessary wiring components, making installation faster and more reliable.

Frequently Asked Questions
Do LED light bars need a relay?
Yes. LED light bars draw significant current, typically 30-50 amps depending on the model. A relay protects your vehicle's electrical system and factory wiring by providing direct power from the battery. Without a relay, you risk overloading your vehicle's factory circuits and switch, which can cause flickering, dimming, or permanent damage. Most quality wiring harnesses, like the KC HiLiTES Gravity Titan LED Light Bar Wiring Harness, include a robust 50-amp relay designed specifically for this purpose.
How do you wire an LED light bar with a wiring harness?
Connect the positive wire from the harness to your battery's positive terminal, and ground the negative wire to a clean metal surface on your vehicle's frame or engine. Route the harness through the engine bay using cable ties to keep wires organized and protected from heat and moving parts. Connect the switch wire to your chosen control point (aux switch, parking lights, or DRL), then test all connections before securing the light bar. The relay and fuse in your harness protect the circuit from electrical faults.
Where should you mount an LED light bar?
The best mounting location depends on your vehicle type and intended use. On trucks and SUVs, roof-mounted light bars provide maximum visibility for off-road driving. Windshield or bumper mounts work for vehicles with factory integration points. Choose a location that doesn't obstruct driver visibility, matches your vehicle's roof line for aerodynamics, and uses existing factory mounting points when possible. Products like the Oracle Integrated Windshield LED Light Bar System mount directly to factory accessory points, requiring no drilling.
How do you test an LED light bar after installation?
After wiring, turn on your vehicle and test the light bar using its switch. Check that all LED emitters illuminate evenly without flickering or dimming. Inspect the beam pattern to ensure it projects forward properly without excessive glare upward. If the light bar doesn't turn on, verify battery connections, check that the fuse hasn't blown, and confirm the relay is seated correctly. Test the light bar in low-light conditions to spot any dead zones in the beam pattern before driving on the road.